The world

Areas and maps

154 areas make up the world of Thera. Directions are given from Temple Square in Solaris — where recall puts you — wherever the game itself gives them, and level ranges are a recommendation rather than a rule. This page starts with the world entire, then the regional plates, then the areas themselves: the ones that have been mapped first.

The overworld Regional maps Getting around Areas with maps Every other area

The whole of Thera

A hundred and fifty-four overworld maps link edge to edge into one continent, 275 squares across and 210 down. Stitched together they look like this — first the two ways the game itself will draw it for you, in ascii and in unicode, and then as a map with a marker on every area entrance. Hover a marker to see where it goes.

As a map

The same continent, redrawn, with every way in marked

Each marker is a link from the overworld into an area. Hover one to read the name of the area it opens on.

Open full size

Regional maps

Eleven plates covering the continent region by region, drawn from the game's own overworld terrain grids. Each one spans several areas, and four of them cover the country a race actually comes from.

Getting around

You can walk anywhere, and for a long time that was the only answer. There are two public services now: coaches on the roads of the mainland, and ferries between the harbours. Both are paid, both take you a square at a time with the country going past, and neither will carry you out of a fight.

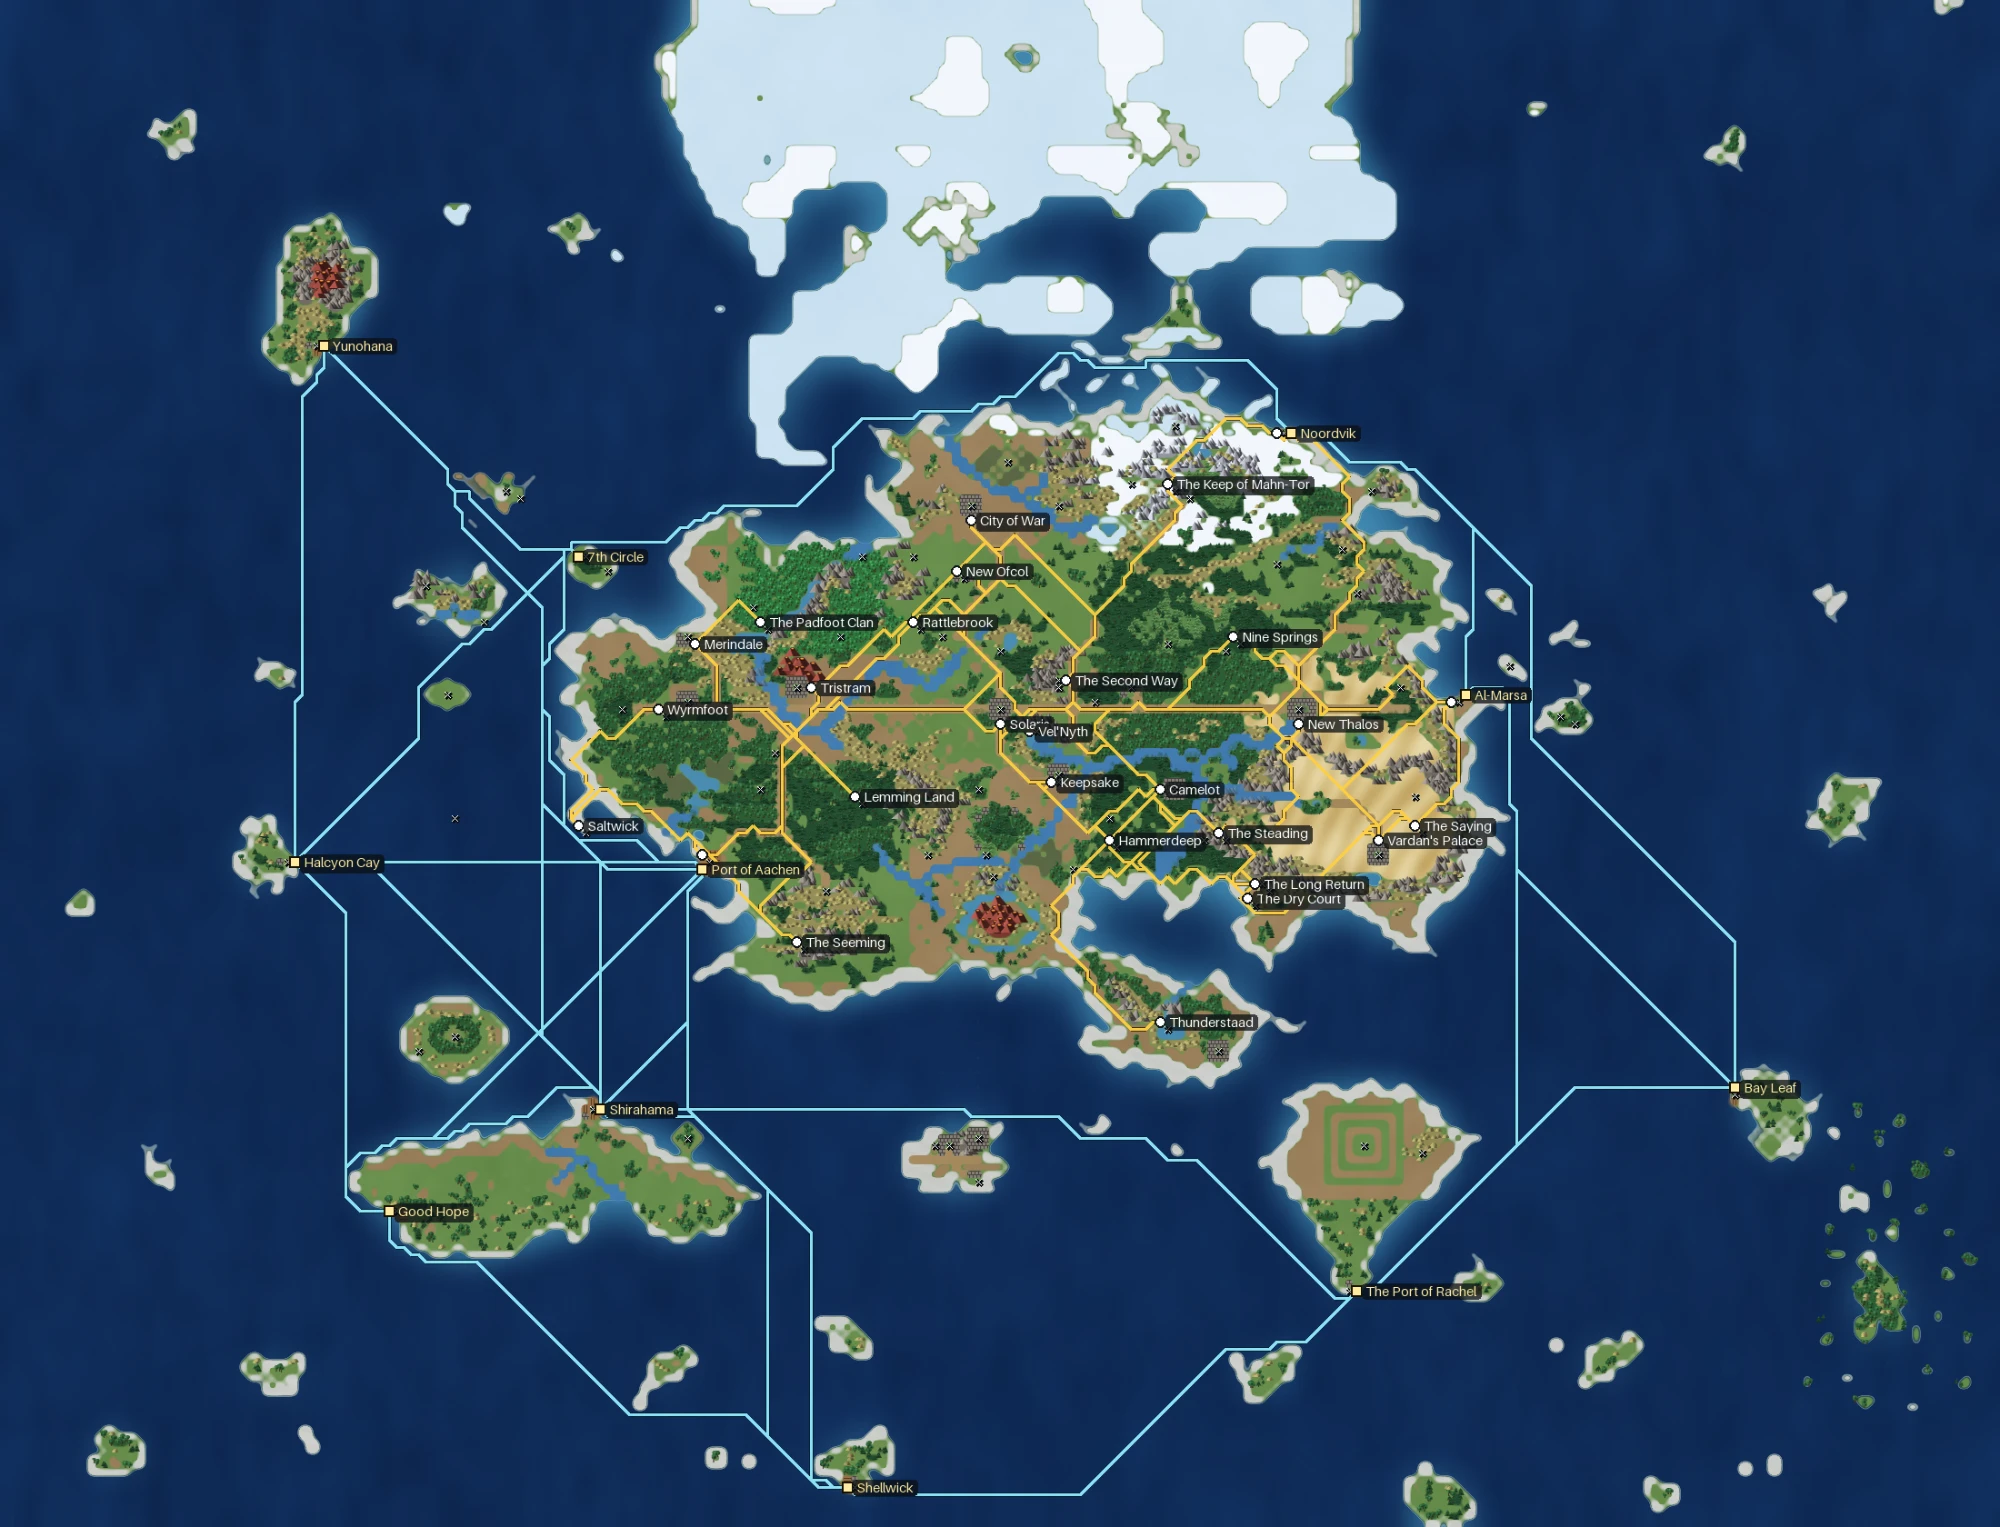
The travel network over a painted map of Thera: yellow roads joining twenty-eight inland coach stops across the mainland, and pale blue sea courses joining ten harbours around it and out to the islands.

The network

Every coach road and every ferry course on one sheet

A circle is a coach stand and a square is a quay — drawn as different shapes on purpose, so the two read apart without relying on the colour. Yellow lines are roads the coach drives; the pale blue ones are courses a ferry sails. The small crosses scattered over the land are the ordinary ways into areas, which is what the rest of this page is about.

Open full size

Coaches

Twenty-eight stops and eighty-one runs between them, all on the mainland. Type coach at a stand to see where one goes from there and what each ride costs; coach <town> pays the fare and puts you aboard.

Half a gold to climb on and twenty silver a league after that, so the three-league hop from the Dry Court to the Long Return is 1 gold 10 and the fifty-five-league haul from Nine Springs to the Keep of Mahn-Tor is 11 gold 50. Most rides land nearer the middle: about five gold and twenty seconds.

Ferries

Eleven harbours and twenty-four crossings, which is how you reach the islands without a ship of your own. ferry at a quay reads the board and ferry <port> buys the passage.

A gold to board and ten silver a league, half the coach's rate. Port of Aachen across to Shirahama is 4 gold 40; the 7th Circle the whole way up to Noordvik is a hundred and ten leagues and 12 gold. A ferry also runs at twice a coach's pace.

Where the two meet

Three places have both a stand and a quay: Al-Marsa, Noordvik and the Port of Aachen. They are the hinges of the whole thing — every island on the map is reachable from the mainland road network by changing at one of those three.

What the ride is like

You are not teleported. The coach or the boat works its route square by square with you on it, so the map moves underneath you and you watch the country go past. Only the arrival is described to you.

Not while you are fighting. Starting a journey mid-fight would leave whatever you were fighting swinging at nobody, so a fight that begins on the road sets you down where you stand.

Every area

Areas that have been drawn come first, and their maps are on the card. Three kinds turn up. An aerial view is a place seen from above. A room plan is every room in an area and every walk between them. A carried map is one of the paper maps sold in game, redrawn character for character from the object itself.